If you’re in charge of updating content for your WordPress website, you may have heard your designer or developer squawk about image sizes.
It’s important. It’s true.
Google considers the speed of your website when deciding to show your page to users. If your website loads slowly (more than 3 seconds), Google may say “Eh, drop ’em to the bottom of the list.” It also frustrates users, resulting in a higher bounce rate. (pro tip: you’d like that below 40%)
The biggest culprit of a slow website is displaying large images. Luckily, they’re the easiest speed issue to fix.
Adjust images before uploading.
Check your images before uploading them.
Any images that you add to your website should not only be resized before uploading but also compressed, at least a little, before uploading them to WordPress.
And no, an image optimization plugin like WP Smush will not be enough if they’re uploaded at a large size (think over 1MB). Those plugins just take what you give them and adjust based on that. The smaller the image upload, the better these optimization plugins will work. More on optimization later.
We recommend using ShortPixel.com.
Save your images in the proper file format.
JPG > PNG
Your image file format can make a big difference in size. For blog posts, you rarely want to upload a PNG. PNGs are meant for using transparencies and by default are a larger file size. Canva uses PNGs as a default image size when you download a graphic because they do tend to be higher quality, especially for print. But on the web, you want to use JPGs or JPEGs as much as possible. They are lighter and you can still get the quality you want.
Pay attention to your image dimensions.
Don’t go higher than 1920px wide or tall.
Image dimensions on the web don’t have to be as large as you think.
With the rise of 5k resolution, high-resolution feels like the way to go. However, that only applies to video, which is another story. I’d recommend using a platform like YouTube or Vimeo to handle videos to display on your website.
The likelihood of someone viewing your website full width on a 5k screen is pretty slim. Especially if your site is informational rather than interactive. On average, users spend 5-10 seconds on websites unless they’re truly invested. They usually aren’t looking to see if your images have a little buzz to them or not.
I’m not saying don’t aim for quality. Below, I’ll explain a few ways you can compress and resize images before uploading, and you’ll see there is some control to ensure your image quality stays great.
To start, something to keep in mind is that full-screen images (and video) often have an aspect ratio of 16:9. The most popular website size is 1920 pixels wide by 1080 pixels tall (1920px x 1080px). Some other popular sizes in that aspect ratio are 5K (5120 x 2880), 4K (3840 x 2160 or 4096 x 2160), and 720. For the web, let’s just stick with a maximum width of 1920 pixels.
The image file size is the most important.
Keep it under 500kb.
My rule of thumb for full-screen images is less than 500kb in size. When there are a lot of images on a page, I even try for 200kb or less. The smaller the size, the better.
Most people don’t pay attention to the size of the images before uploading, but servers do. You may say, ‘but I want nice crisp, pretty images throughout my site!’ That’s ok, you can have that pretty photo! Just don’t upload them at the highest resolution and dimensions you could find. Most folks choose 300 DPI as a standard high-quality photo. But, DPI (dots per inch) and PPI (pixels per inch) mean less in the web world than in print. Websites prefer 72 DPI so that images can stay small.
For comparison:
If you have a professional image from a photographer or stock photo website, it’s likely 300 DPI, 6000 pixels wide, and has a size of 5MB or higher. That’s a high-resolution photo.
Spoiler. The largest you want your entire page to be on your website is 5MB.
Now, if you take that same photo, resize it to 1920 pixels wide (proportionate to whatever the height is), save it for web (changing the DPI to 72), and compress it, 9 out 10 times you’ll get that photo below 500KB while keeping it sharp.
Now you can have many more images on your single page without affecting the load time! That makes Google stoked.
How to size images for a WordPress website before uploading.
It’s pretty simple! In the following examples, I’m using a free image download from Unsplash. There are 3 steps to follow if you’re using a JPEG or PNG, which are the most commonly uploaded images. This article has some great descriptions of the differences between the two.
Step 1: Resize or crop your image to the appropriate dimensions. 1920 pixels wide if it’s going to span the whole width of the site. Go for 800 pixels wide or less if it’s going in a smaller location.
Step 2: Change the resolution to 72 DPI, save the image for web, or use a compression app.
Step 3: Upload your photo to your website!
Personally, I use Adobe Photoshop (The Save for Web feature is mighty handy). But there are a few free resources out there that can achieve the same thing.
Mac Preview
If you’re on a Mac computer, resizing images is a breeze. The default Preview app gives you the basic tools needed to start the compression process.
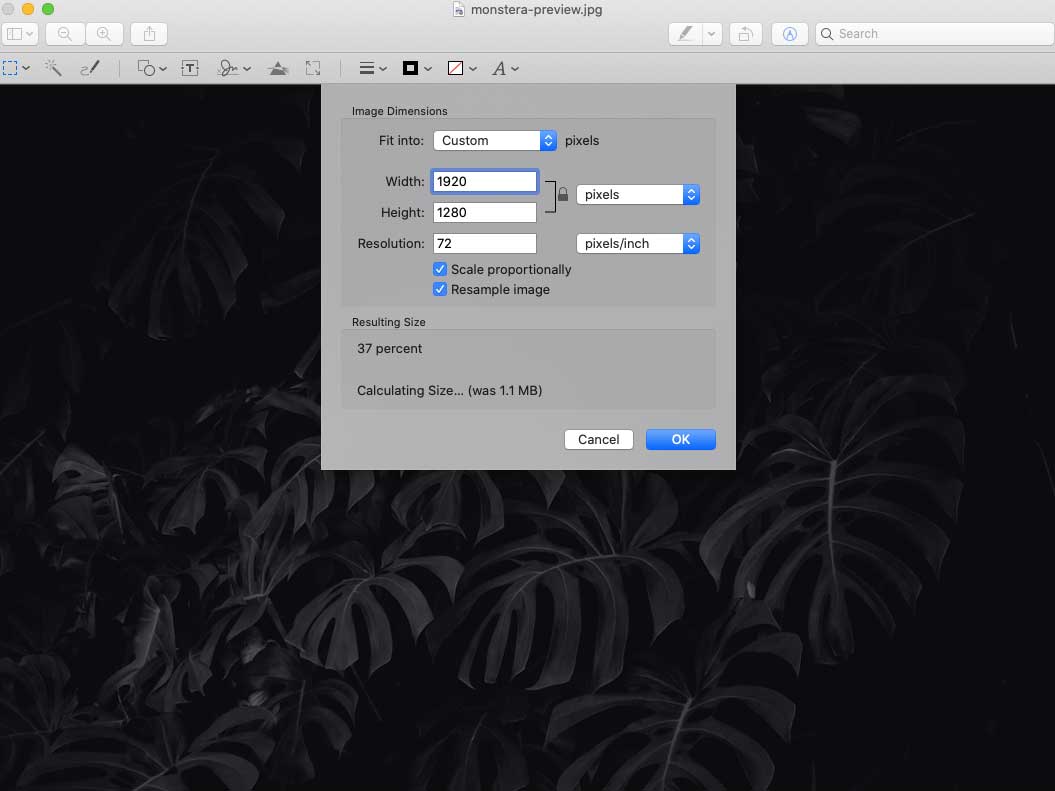
Change the width to 1920 (it will proportionally change the height to match) and change the resolution to 72 DPI.
In this example, you’ll see the difference this simple solution will make!
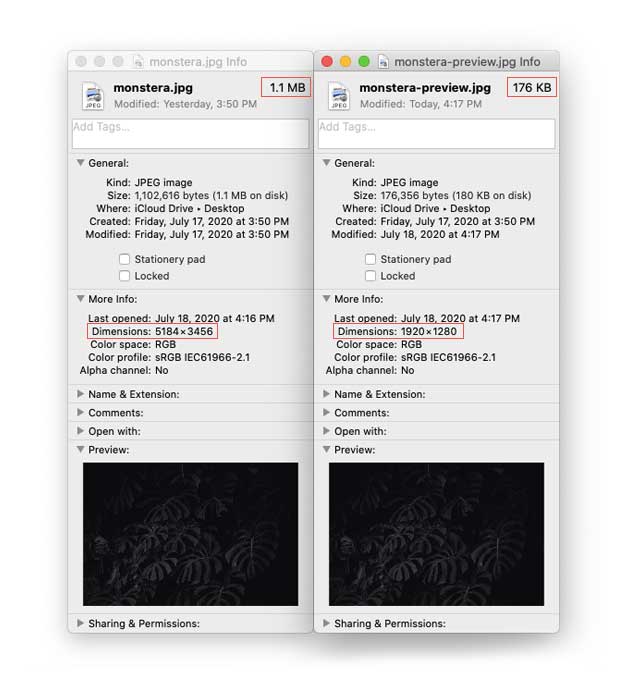
The original image was sized at 5184px x 3456px, 1.1MB.
Changing to 1920px x 1280px brought the overall size to just 176KB.
Great.
Now, I would normally be happy with this image upload size. BUT let’s keep going.
Short Pixel
If you’re looking for a simpler solution to get the size down without paying attention to the dimensions. ShortPixel is a really great (and free) tool.
![]()
Their online compression tool lets you upload photos up to 10MB to compress them without changing the dimensions or DPI manually. While the dimensions stay the same, you can see that even just uploading the original Unsplash image had an 85% reduction in size when using the Lossy selection. You can view the differences between Lossy, Glossy, & Lossless compression on their website, I prefer Lossy most of the time.
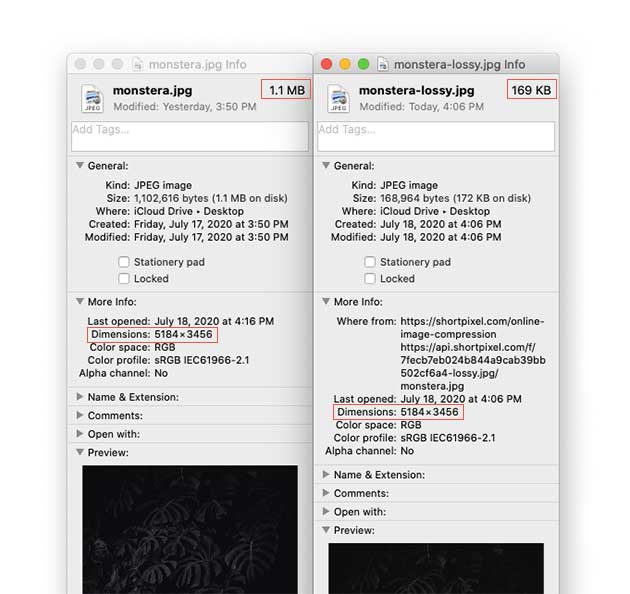
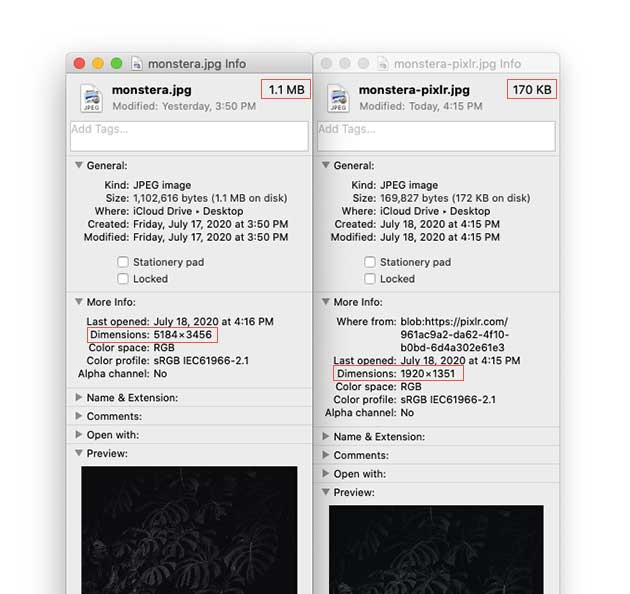
You’ll see the difference between the original and lossy images here. It went from 1.1 MB to 169 KB. A little smaller than just using Mac Preview.
Combine the two
If you really want to take it a step further and see how small you can get an image (without losing the quality of course). I’d recommend using both of these tools together.
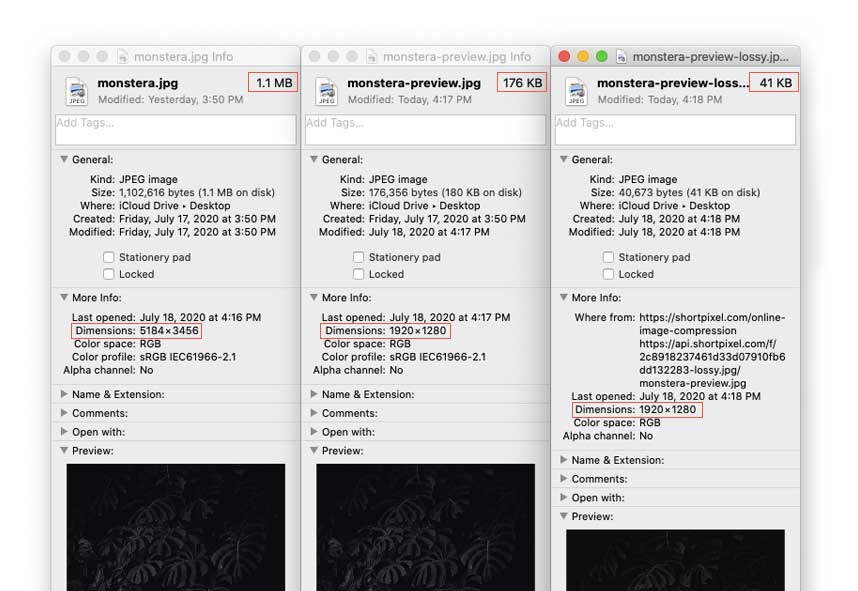
After resizing with Mac Preview AND uploading to ShortPixel, you’ll see the reduction is HUGE. The original image was 1.1 MB, Mac Preview resize brought it to 176KB, then adding it to ShortPixel brought it down to 41KB. PERFECT.
If you’re worried about quality with this route, take a look below. That’s our compressed image! Here’s the original from Unsplash.

Looks great, right?
Bonus: Pixlr
If you’re looking for a resize and crop tool that is a little more advanced than Mac Preview but don’t want to dive into Photoshop, I recently found Pixlr E. It’s a free online photo editor that honestly looks and acts pretty similar to Photoshop!

They have a few plans for just $3.99 – $14.99, though they also have a free version! I’m not an affiliate; I don’t care if you buy this or not.
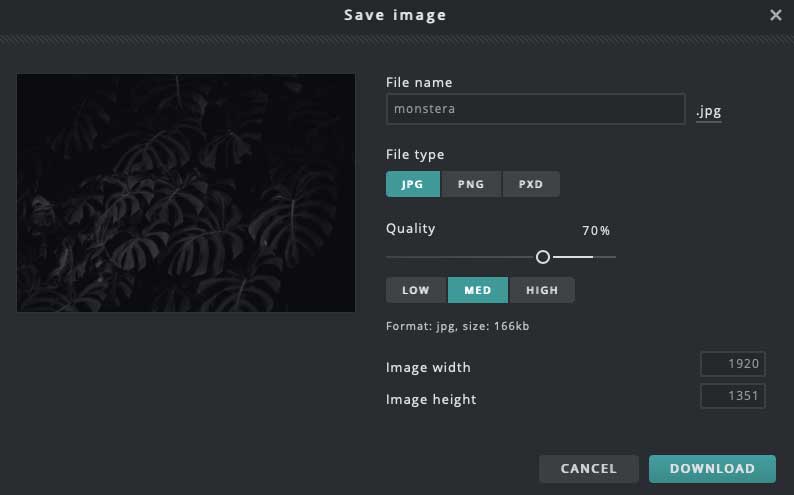
While they don’t have a specific Save for Web function like Photoshop, you can adjust the quality and preview what the image will look like before downloading.
That’s a pretty good reduction size, down to 170KB. I’d still like to push for a smaller size. But the real bonus of this tool will come into play if you want to edit the colors of your photo, add text, etc.
Optimizing images after uploading.
If you’ve gotten into the habit of at least resizing and uploading small images, I’m happy. But there are some extra optimization plugins that focus on image loading along with compression after your images are uploaded. The good thing about these is that most are a set it and forget it solution. Once the plugin is on your site and set up, most of these will compress new images automatically.
Here are my favorites:
- WP-Optimize – it also has a caching option, database cleaner, and the paid version allows for easy lazy loading.
- WP Smush
- EWWW Image Optimizer
And there you have it! Sizing your images for your website isn’t too stressful now, right? Let us know if you have any questions or tips you’ve found along the way that we can pass on.